http://www.youtube.com/watch?v=R_Jo3v25WG4
Author Archives: rich agnew
What is a grand piano regulation?
Please see our video link http://www.youtube.com/watch?v=ycKjq6YnLoI
More Galleries
Comments Off on What is a grand piano regulation?
Major Parts of the Piano

This gallery contains 1 photo.
As the illustration shows, the pianos is a composite, intricate, piece of machinery that combines ingenuity with graciousness. Here are some of the major components of the piano: A: Soundboard B: Front Stretcher C: Action Stack D: Pedal Lyre E: Cast … Continue reading
More Galleries
Comments Off on Major Parts of the Piano
Step 6: New Felting/Pedal Plating or Chroming/Final Coats of Piano Lacquer
This gallery contains 5 photos.
As the project nears completion, all the previous labor-intensive steps are producing fine results. Lacquers come in a variety of sheens and in this project I used the highest sheen possible. Piano lacquer has a rich amber tone to it … Continue reading
More Galleries
Comments Off on Step 6: New Felting/Pedal Plating or Chroming/Final Coats of Piano Lacquer
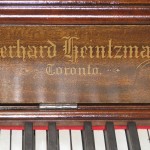
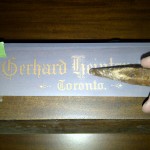
Step 5: Sanding Sealer and Decal Replacement
This gallery contains 3 photos.
After the first few coats of sanding sealer is applied, the decal is replaced using a company that has copied most of the decal designs from the past and present. The decal is accurately positioned and then rubbed on and … Continue reading
More Galleries
Comments Off on Step 5: Sanding Sealer and Decal Replacement
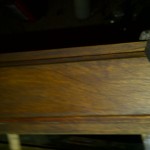
Step 4: Pore Filling/Staining
This gallery contains 2 photos.
Pore filling helps to produce a less “open” finish creating an ultra-smooth finish. This is a semi-liquid material that also stains the surface thus doing two things in one application. Here, a walnut pore filling stain was used.
More Galleries
Comments Off on Step 4: Pore Filling/Staining
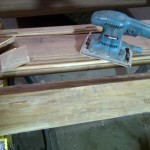
Refinishing: Step #3 Sanding/Regluing
This gallery contains 2 photos.
All the piano cabinet pieces have to be carefully sanded. I start with 120 grit. Flat pieces can be sanded with a standard sander but curved and smaller intricate pieces have to be done by hand. Any loose pieces should be re-glued … Continue reading
More Galleries
Comments Off on Refinishing: Step #3 Sanding/Regluing
Step 2: Stripping
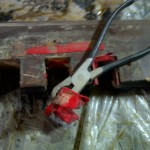
This gallery contains 6 photos.
Refinishing: Step 2 Furniture Stripping This is probably the most unpleasant part of the project but it has to be done and done right. The old varnish has to be all removed. This is done by using various agents. The … Continue reading
More Galleries
Comments Off on Step 2: Stripping
Refinishing Step 1: Disassembly and Cleaning of the Upright Piano
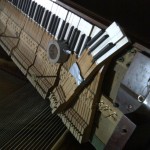
This gallery contains 9 photos.
After the piano enters the shop, it has to be disassembled and the screws labelled so that everything goes back where it should. This includes all hinges, pedal hardware, locks, and other hardware that is attached to the cabinet. The … Continue reading
More Galleries
Comments Off on Refinishing Step 1: Disassembly and Cleaning of the Upright Piano
What is involved in piano refinishing and why is it so expensive?
Piano refinishing is a very labour intensive project. I will endeavor to demonstrate this through the following pages to show the various steps that are involved in doing a proper job. Please go to the category called “The Piano Shop” … Continue reading
More Galleries
Comments Off on What is involved in piano refinishing and why is it so expensive?