Refinishing: Step 2 Furniture Stripping
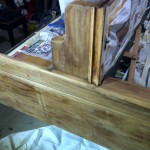
This is probably the most unpleasant part of the project but it has to be done and done right. The old varnish has to be all removed. This is done by using various agents. The goal is to make sure that the original wood is exposed. Unfortunately, the original decal cannot be saved unless it is masked off. However, this leaves an area of the piano right in the middle of the center fallboard that will be a rectangular dark area in comparison to the rest of the piano. It is better to strip off the old decal and replace it with a replica. All felting has to be removed and will be replaced with new. Stripping off the old finish is also an exciting time in the project in that you get to see what really lies beneath. You will notice in the picture below that the original varnish has darkened over the years due to waxes and other reasons. That is seen on the top lid portion of the piano (remember: the piano is lying on its back). The side has been stripped. Quite a color difference. The natural grain is exposed and this is what gives the refinisher an idea of what he wants the final look to be. Our goal is to always emphasize the natural wood grain.
The following shot is the side panel that has been stripped

